
Appearance
Build your first part
A plate with a hole through it, dimensioned so that changing one number reshapes it correctly. About fifteen minutes.
Nearly everything you build here follows that sequence, with more of each stage as the parts get bigger.
1. Draw a rectangle
Click into the canvas so it has keyboard focus, then press R for the Rectangle tool. Click once for one corner and once for the opposite corner.
You get four points and four lines forming a closed loop. The tool also adds two horizontal and two vertical constraints for you, so the box stays a box when the solver next runs.
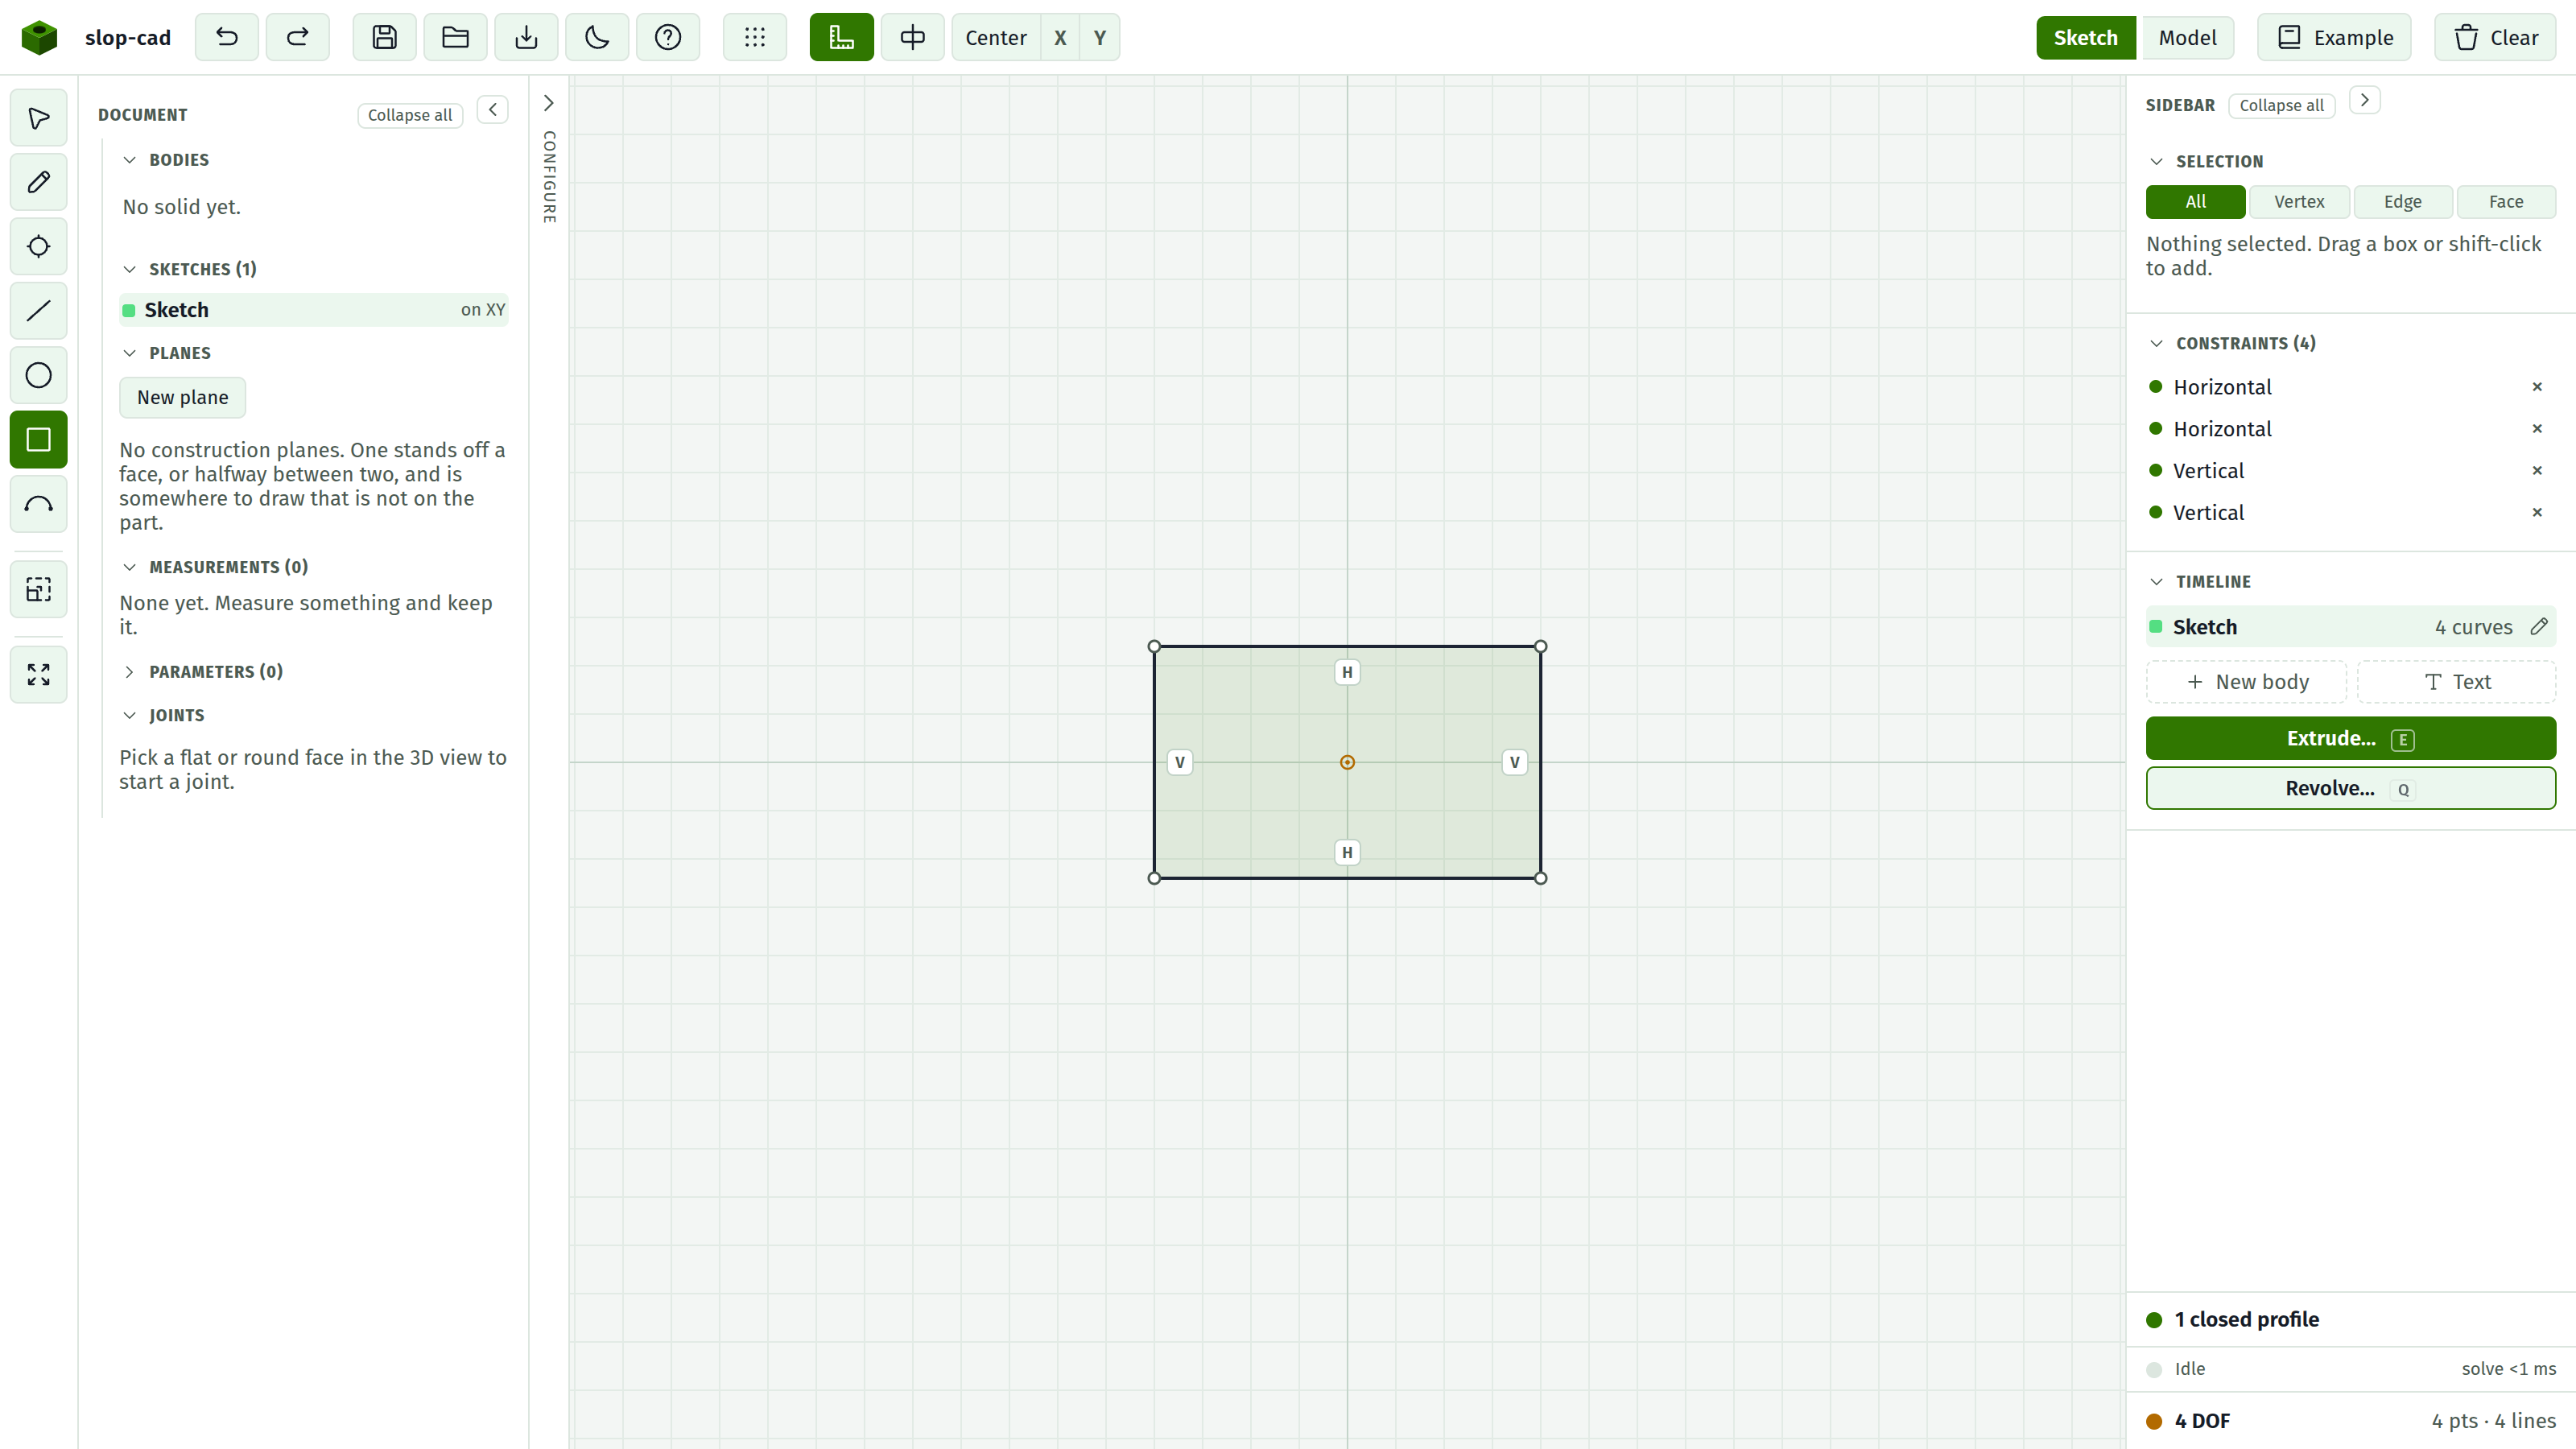
Two rows at the bottom of the sidebar are worth a look now, because you will be reading them for the rest of the part. The green one says 1 closed profile, meaning the loop encloses an area and could be extruded. The one below it counts DOF, degrees of freedom, meaning the sketch can still be pushed around.
Precision does not matter yet. Dimensions come next, and they will move the geometry to where you say.
2. Pin it down
The rectangle can still slide anywhere on the plane and can still be any size. Three things fix that.
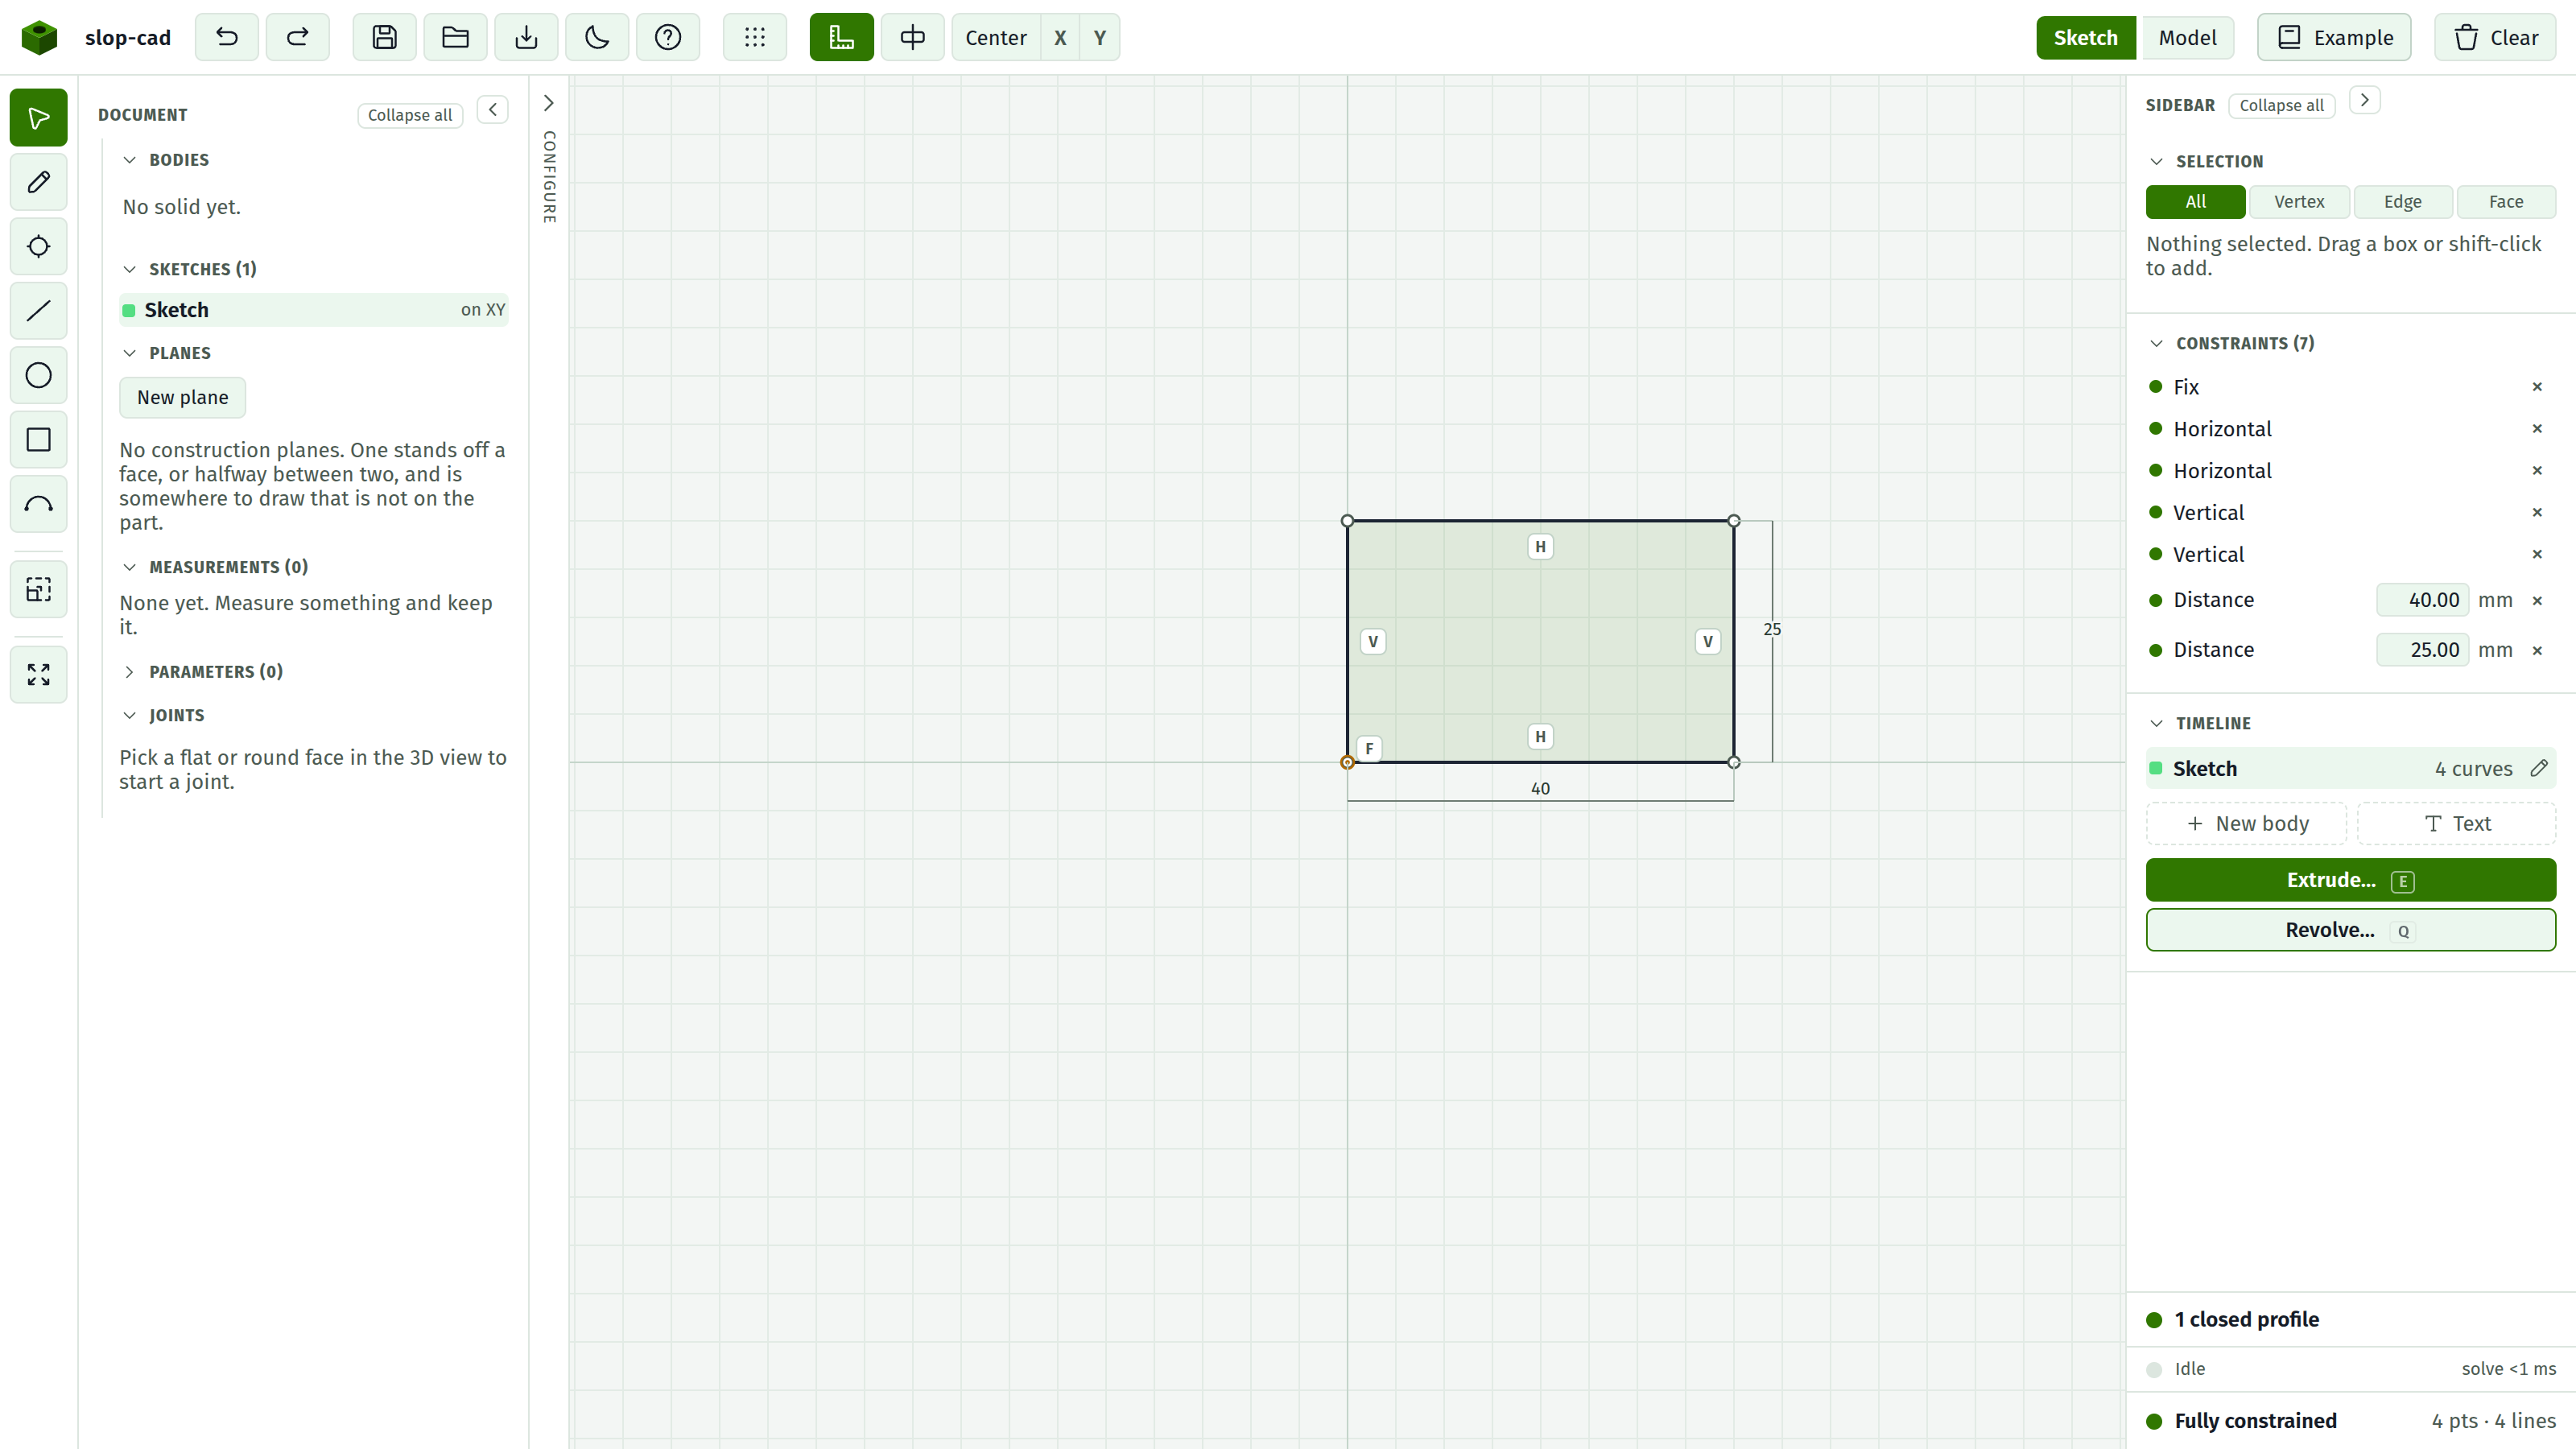
Anchor one corner: click the bottom-left point, then press Fix in the Selection section of the sidebar. That corner is now nailed to the origin of the sketch.
Dimension the width: click the bottom-left point, hold Shift, and click the bottom-right point. The Selection section now offers Distance. Press it. A dimension appears on the canvas and a row appears in the Constraints docket with an editable value. Type 40 and press Enter.
Dimension the height the same way, using the two left-hand points, and set it to 25.
The status row at the bottom of the sidebar should now read Fully constrained in green. That is where you are aiming: the sketch has no freedom left, so it can only change when you change a number.
TIP
If the row still shows a DOF count, click it. The geometry that can still move is highlighted in amber, which tells you what is missing. See diagnose a sketch.
3. Add the hole
Press C for the Circle tool. Click once near the middle of the plate for the centre, then once further out to set the radius.
The profile row now reads 2 closed profiles. The circle sits inside the rectangle, so it will read as a hole rather than as a second part.
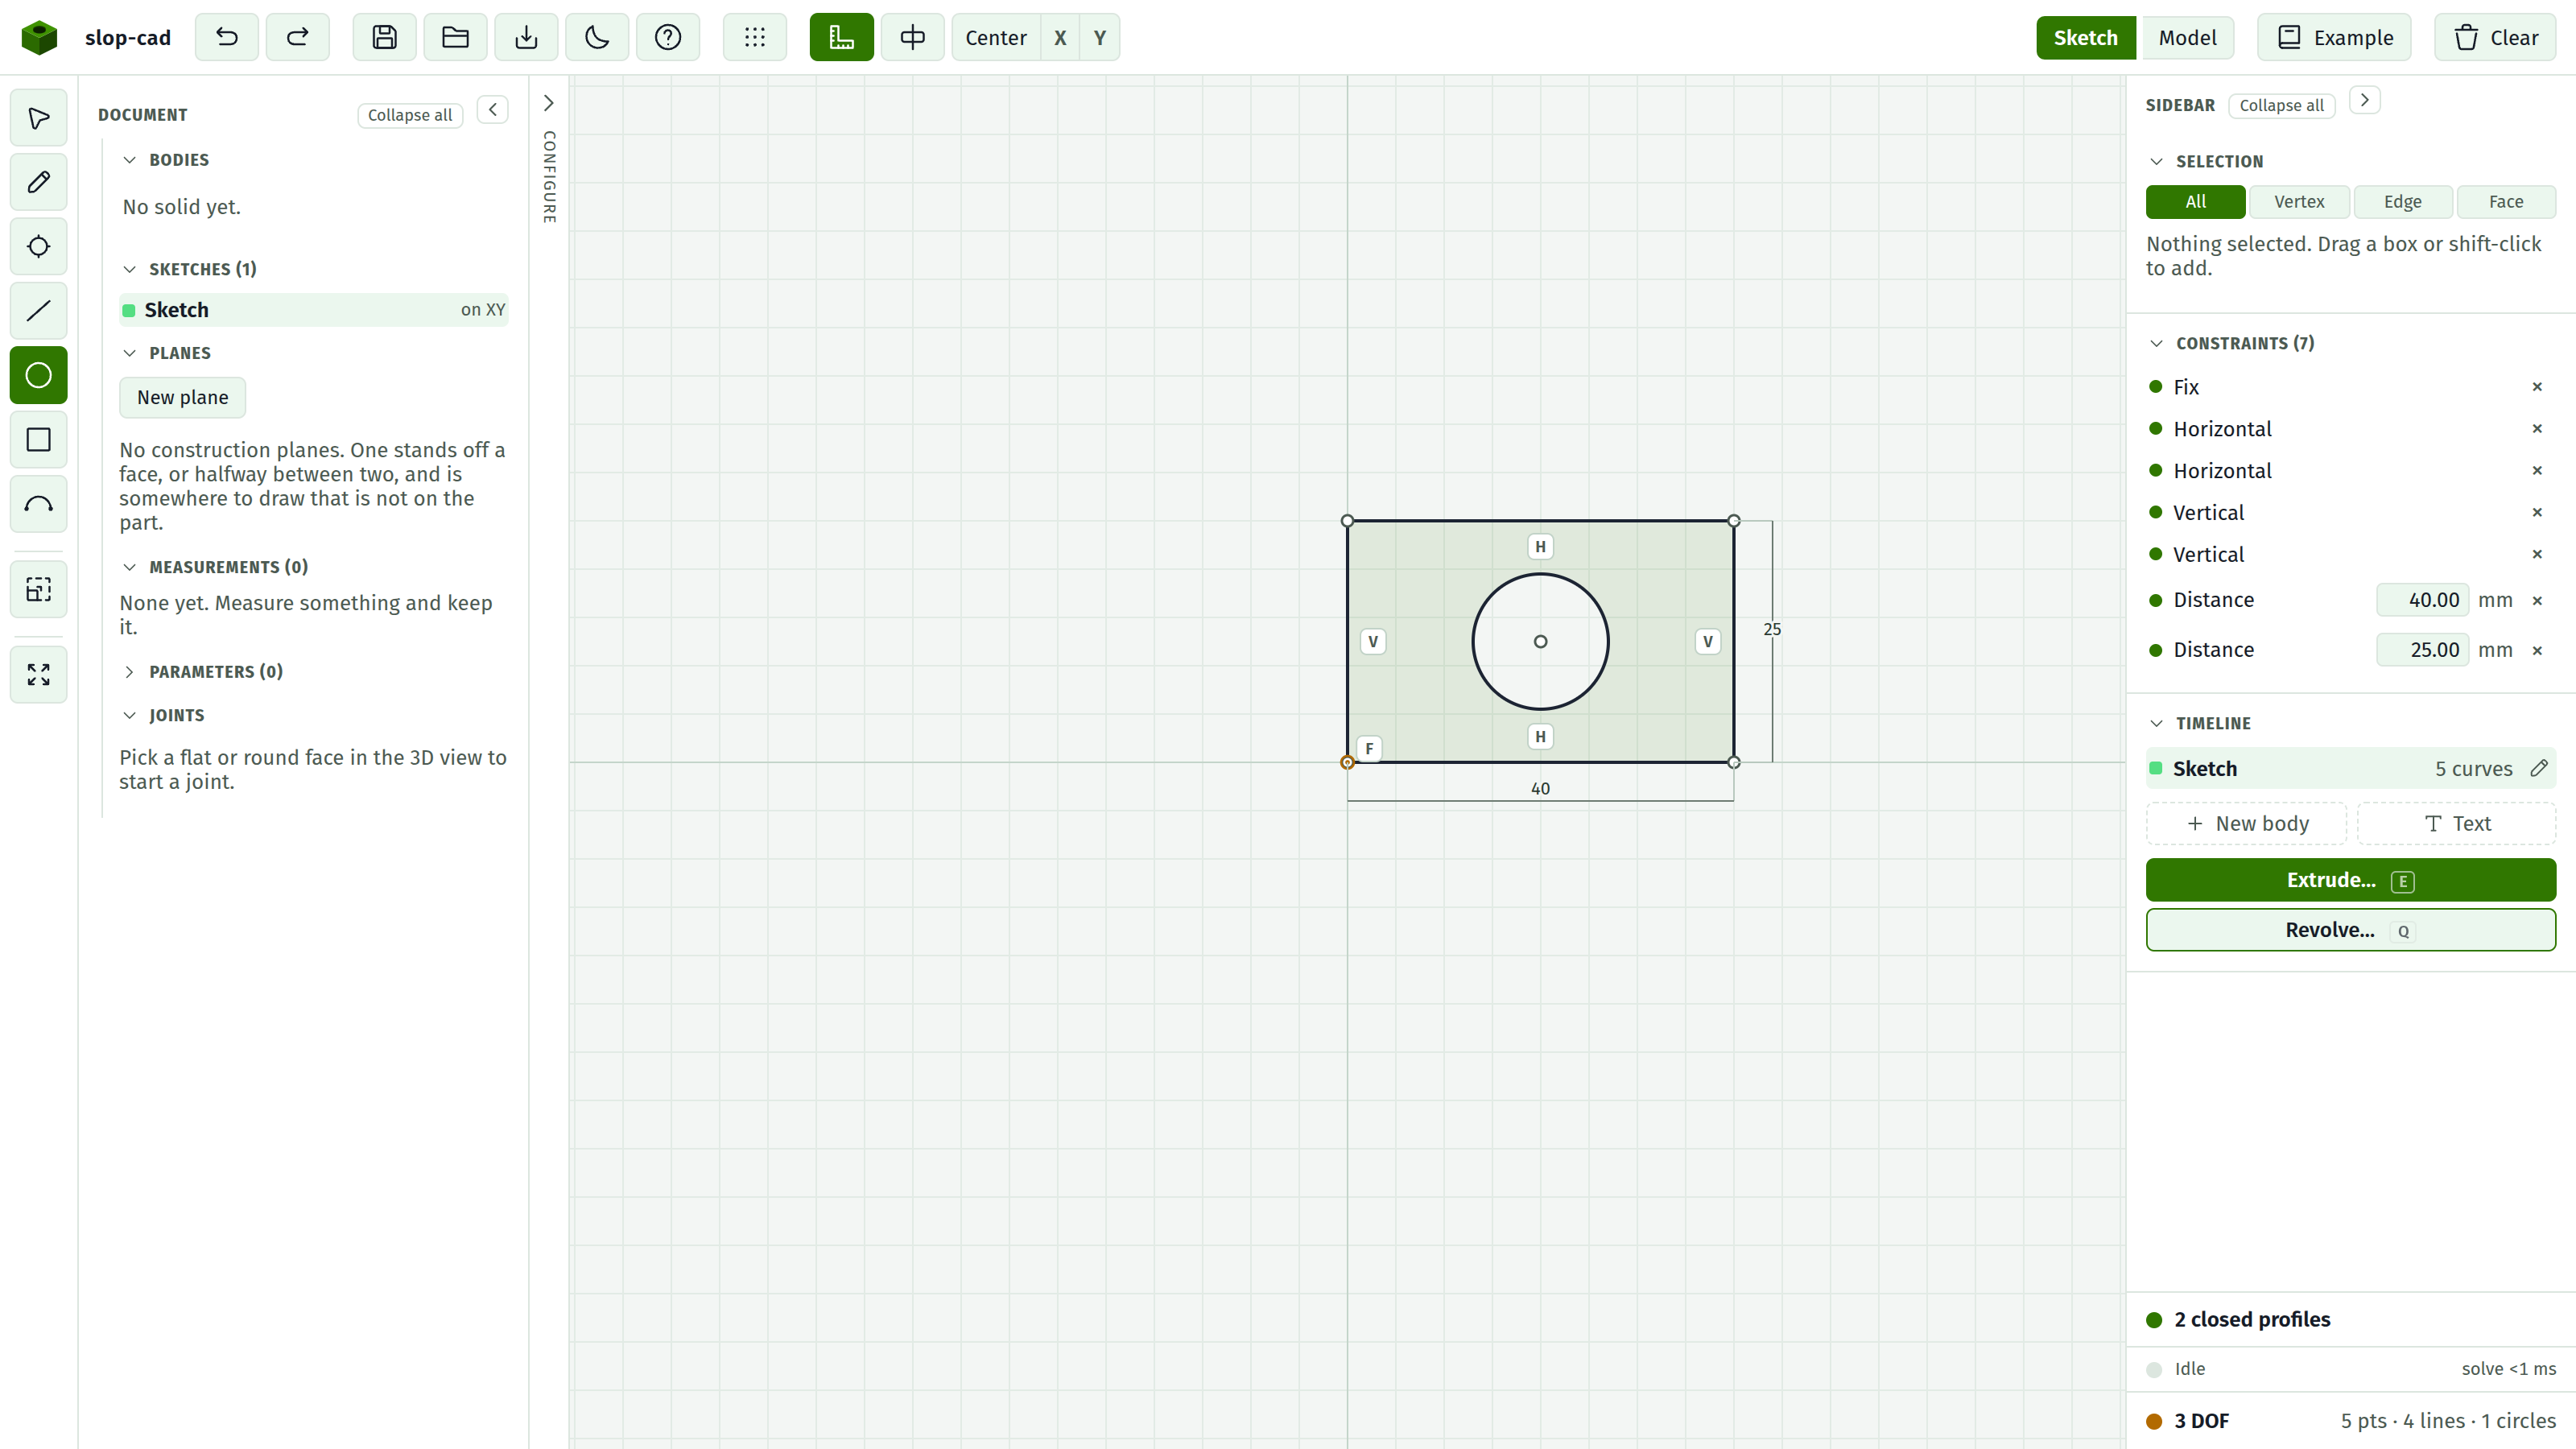
Dimension it properly: click the circle, press Diameter, and set the value to 14.
4. Push it into a solid
In the Timeline section of the sidebar, the extrude control is waiting. Type 10 into the distance field and press Extrude.
The view switches to Model, and there is your plate.
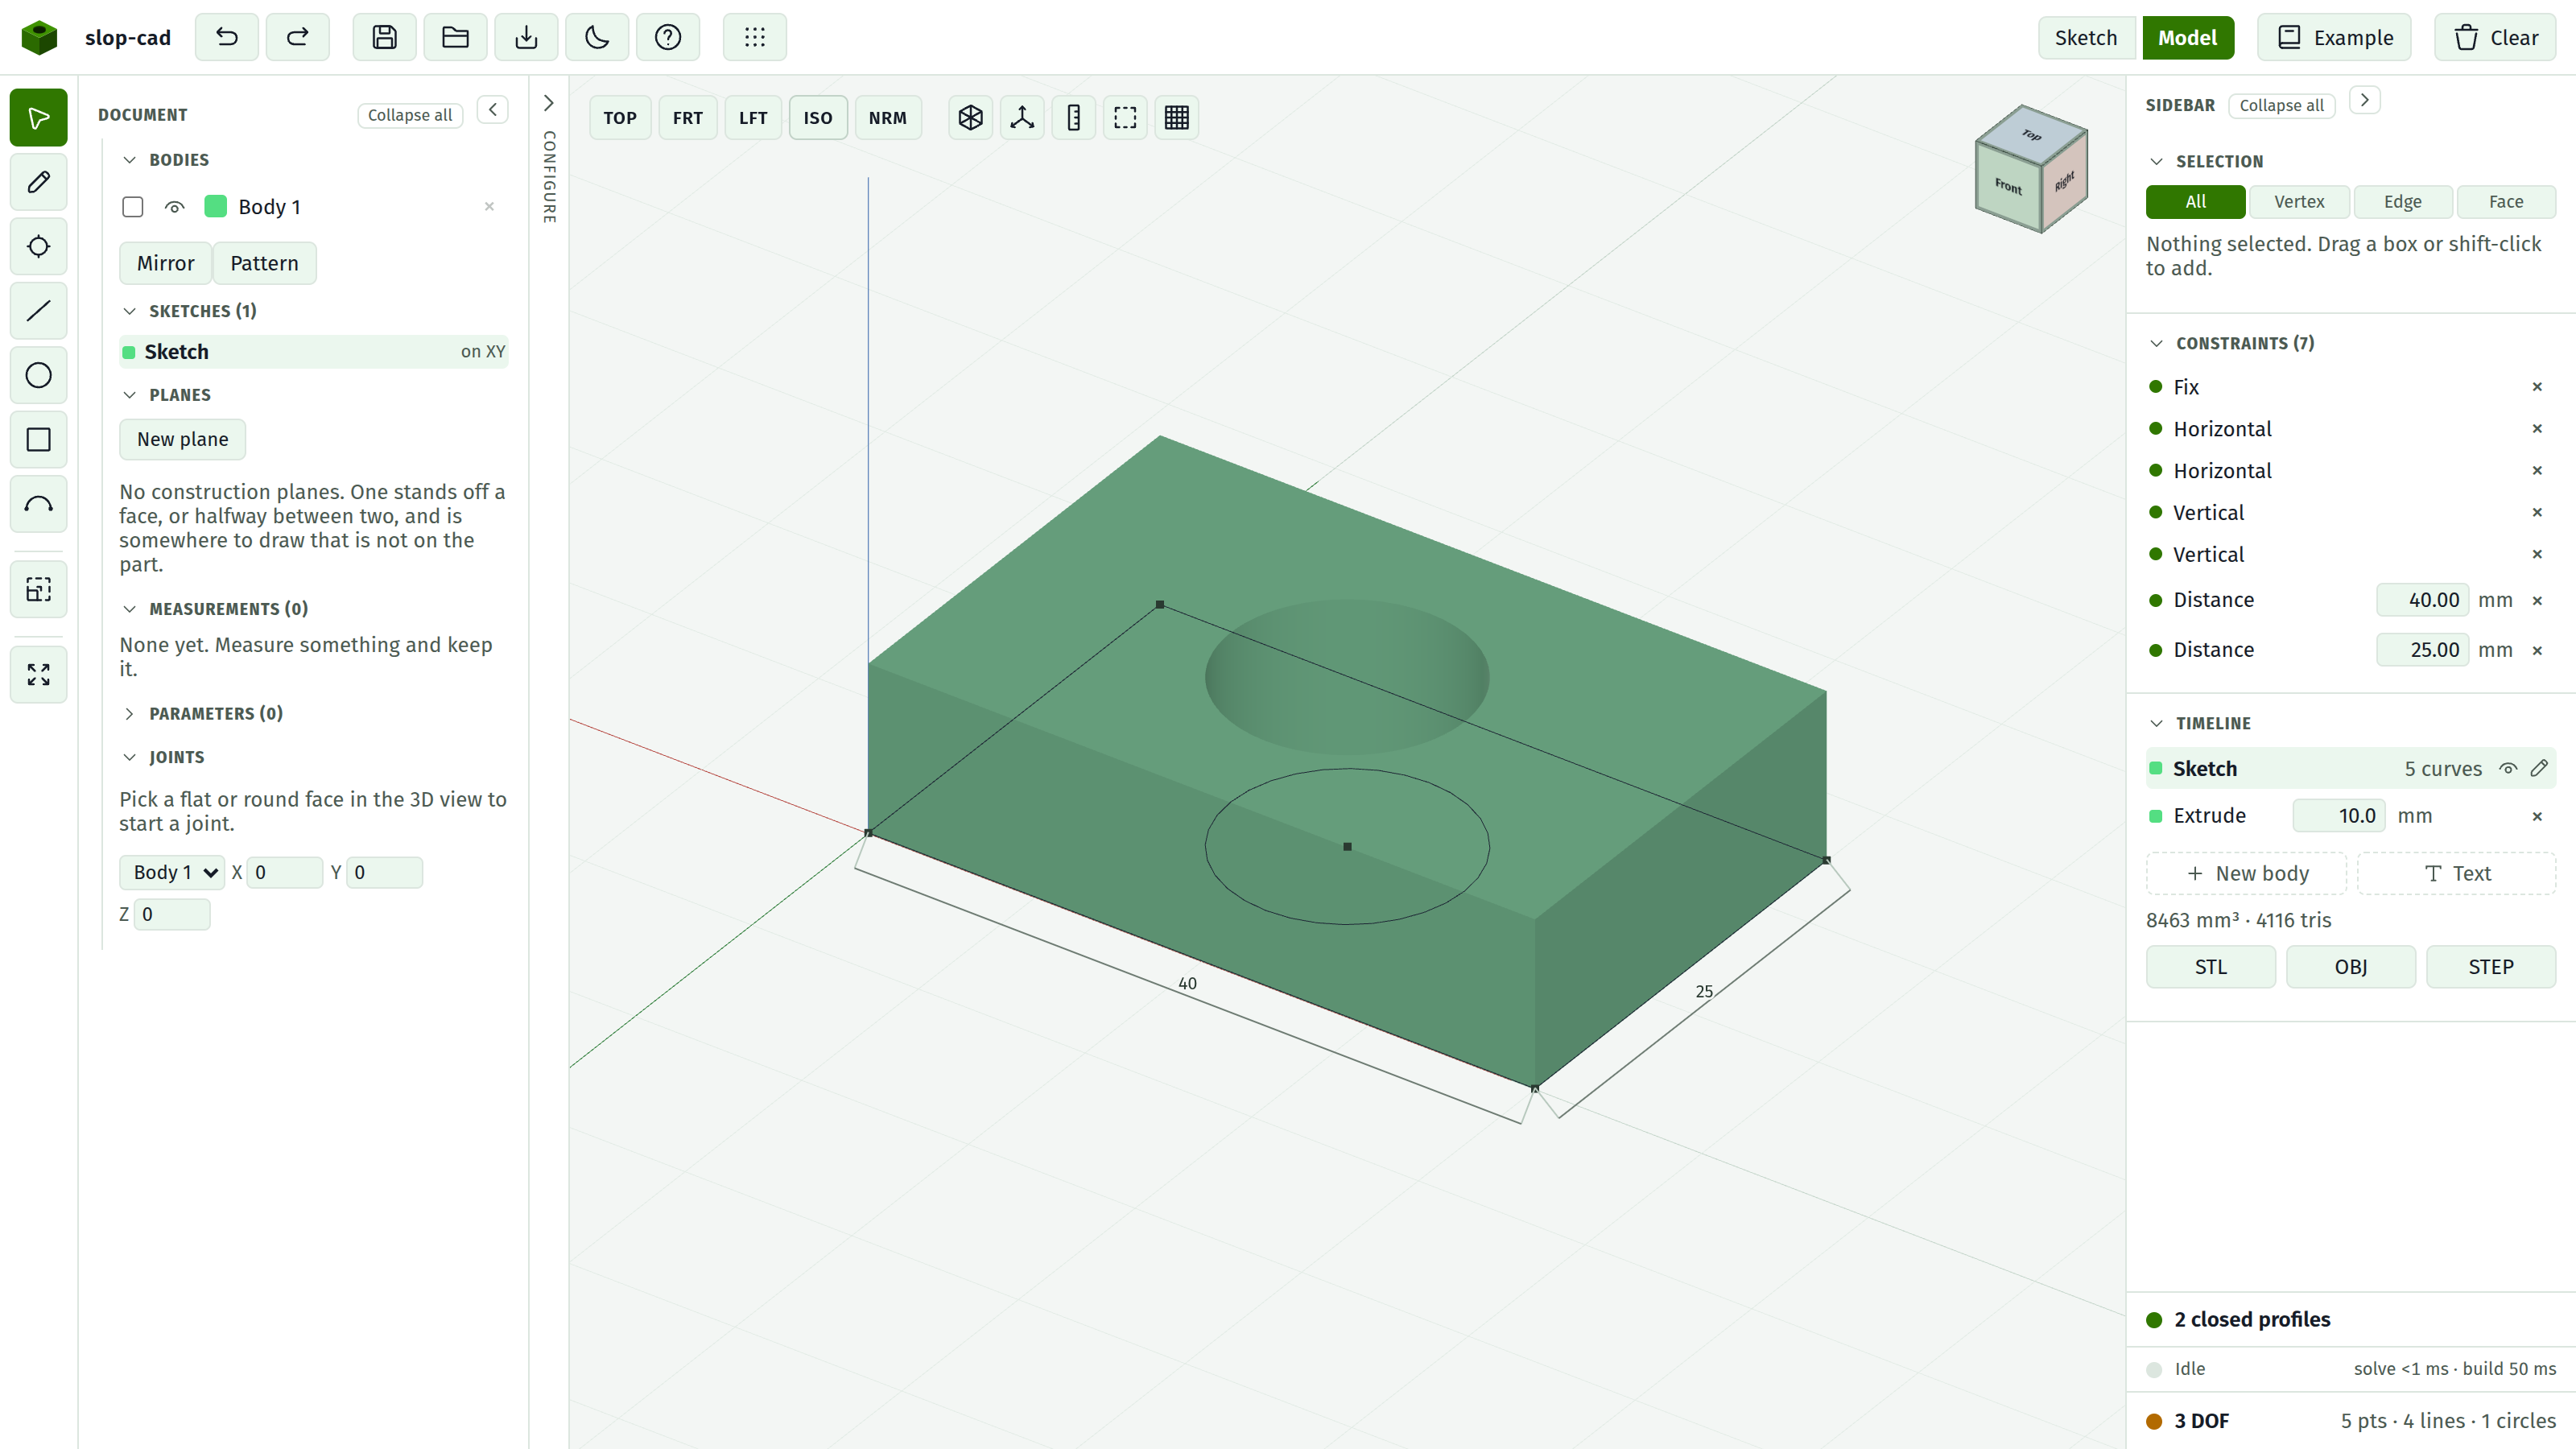
Drag with the left mouse button to orbit, scroll to zoom, drag with the right button to pan. The Top, Front, Right, and Iso buttons snap to a standard view.
The Timeline now shows a Sketch row and an Extrude row, with the volume and triangle count below them. The Extrude row's distance is a live field: change it and the solid rebuilds.
5. Soften an edge
With the Selection mode on All or Face, click the top face of the plate. The Selection section reports it and offers a rim blend.
Type 2 into the Rim field and press Fillet rim. Every edge around the top face rounds in one pass, and the corners meet properly because they were blended together rather than one at a time.
A blend appears in the Timeline as its own row, with its own editable size.
6. Prove it is parametric
Switch back to Sketch, find the 40.00 row in the Constraints docket, change it to 60, and press Enter.
The sketch re-solves, the solid rebuilds, and the fillet is still on the same edges of the now-wider plate. Nothing had to be redrawn, and that is what the constraining in step 2 bought you.
7. Take it away
Under the Timeline stats there are STL and OBJ buttons. Either downloads the solid as a mesh, in millimetres, ready for a slicer or a renderer.
To keep the editable document rather than the mesh, press Save in the top bar. That writes a sketch.slop.json file which Open reads back, with the sketch, the dimensions, the features, and the blends intact.
What to read next
| The interface, named | So the rest of the documentation makes sense |
| Tutorials | The same ideas on a part with more to it |
| Constraints and freedom | Why fully constrained is worth chasing |
| What it will not do | Before you commit to something larger |