
Appearance
Blend an edge
For when a rim blend takes too much, or when the edges you want are not one face's boundary.
The steps
- Switch to Model.
- Press Top to flatten the view. Silhouette edges then sit near the canvas border, which makes them much easier to hit.
- Set the select mode to Edge 3 so you cannot catch a face by accident.
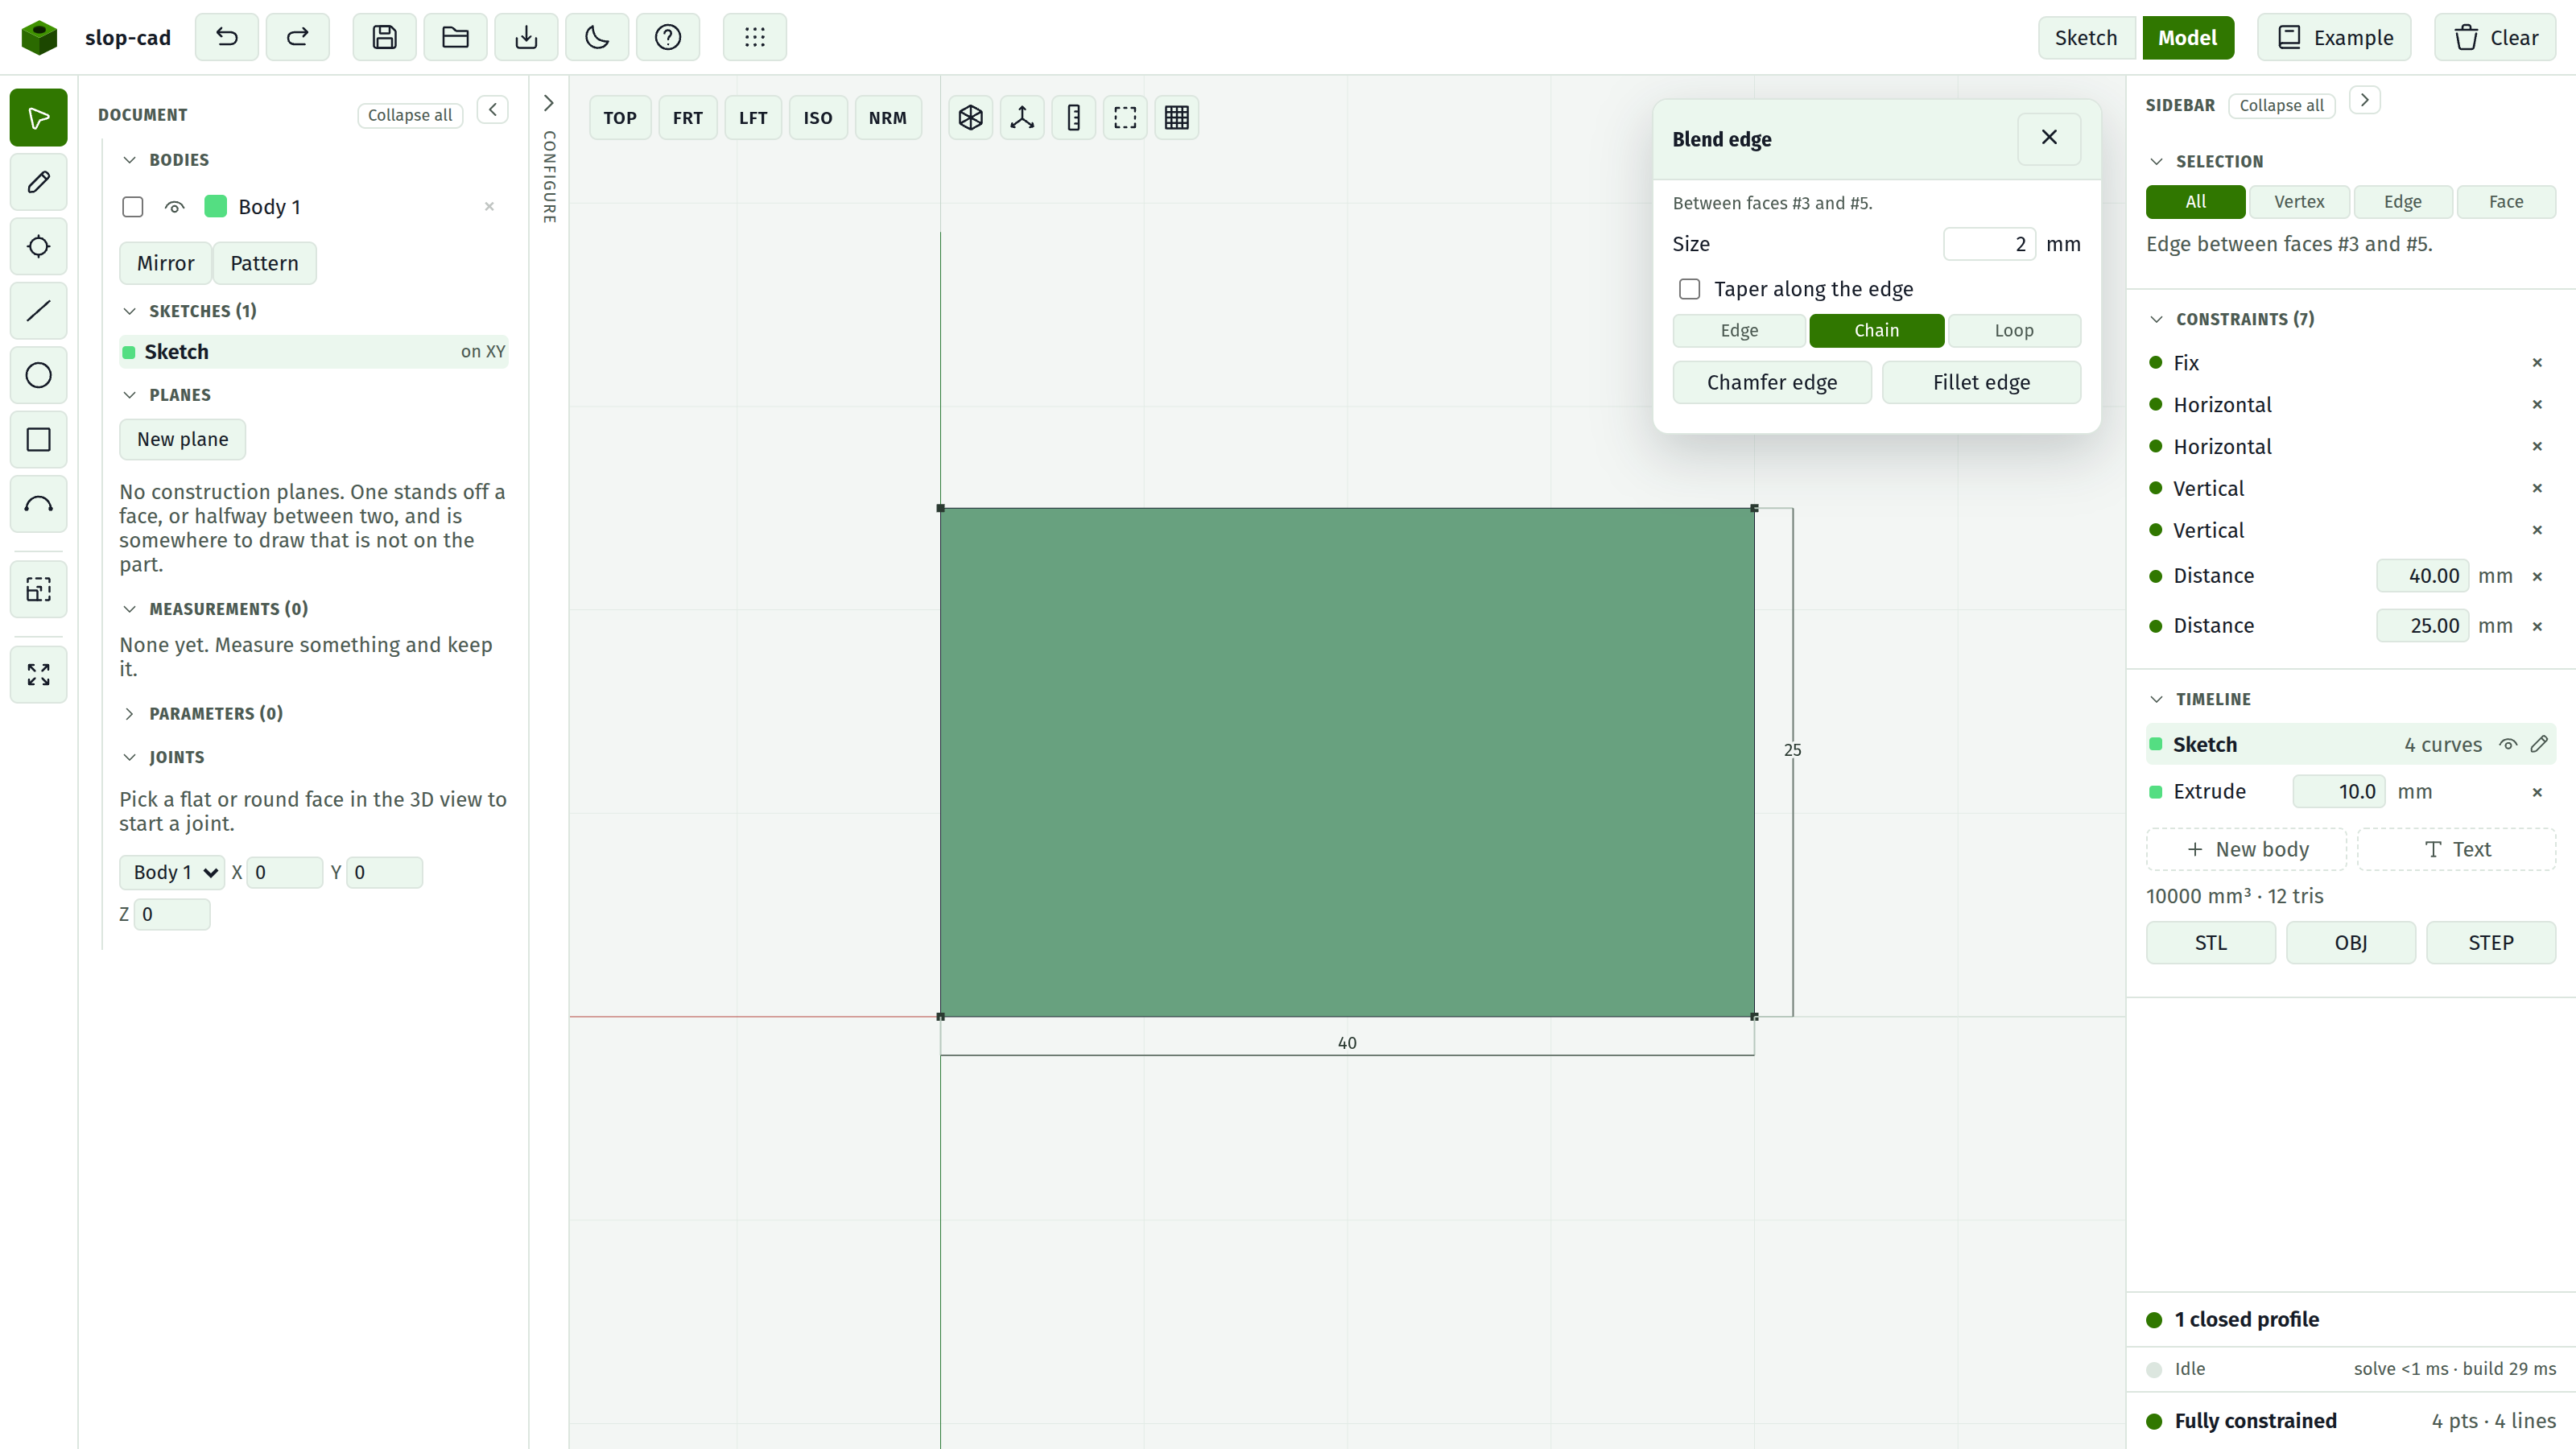
- Click the edge. The blend dialog opens on it, naming the two faces that meet there.
- Set a Size and a Reach.
- Press Chamfer edge or Fillet edge.
Esc closes the dialog and drops the pick if you picked the wrong edge.
Reach
Three options, and this is the choice that matters.
| Reach | Takes | Use for |
|---|---|---|
| Edge | This edge alone | When the neighbours must stay sharp |
| Chain | On through every tangent junction, stopping at the first corner | A boundary that runs smoothly through arcs |
| Loop | The whole loop this edge belongs to, corners and all | Rounding a hole |
Chain is the default and is usually right. It follows the shape's natural continuity: where the geometry flows smoothly it keeps going, and where there is a genuine corner it stops.
Loop is the answer to "how do I round a hole", since a rim blend leaves holes sharp.
Size
For a chamfer, the setback along each face, giving 45 degrees. For a fillet, the radius. Greater than zero, and it accepts arithmetic.
A size that changes along the edge
Tick Taper along the edge and the size field splits into From and To, one for each end. A fillet then runs from one radius to another; a chamfer widens or runs out.
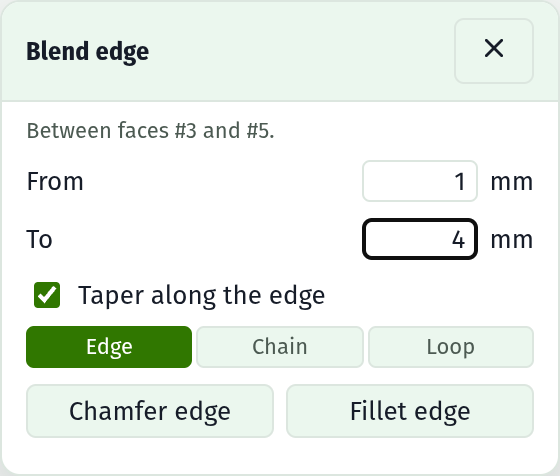
Ticking it sets the reach to Edge and keeps it there. A run of several edges has no single parameter to run the size along, so a taper only means anything on one edge.
Useful for a lead-in that starts wide and dies out, or a fillet that grows toward the loaded end of a bracket.
Both numbers must be greater than zero. To end at a sharp corner, use a small To rather than nothing.
Selecting the right edge
Edge picking is fiddly. What helps:
- Top view. The outline sits near the border and the edges are far apart.
- Edge select mode 3. Faces stop competing.
- Zoom in. The tolerance is a few pixels, so a bigger edge is an easier target.
Edges hidden behind the solid are not grabbable through it, so clicking near an outline picks the edge you can see.
It survives edits
A blend names its edge by the two faces meeting there, not by a number. Widen the plate and the chamfer is still on the corresponding edge of the wider shape.
When it refuses
That edge sits on a face the kernel could not name; blend another one. Usually a face produced by an earlier blend.
Also refused:
- A chain crossing between faces, so you cannot ask for one blend running around a boss rather than along a single face's boundary. Blend each face's boundary separately.
- A cylinder whose axis crosses the edge. No workaround.
Prefer a rim where you can
Two edge blends meeting at a corner do not mitre the way a single rim blend does, and with the fallback method they can leave a small spike. If both would give the shape you want, use the rim blend.
See also
- Blends, including the exactness note
- Rounding a body