
Appearance
Manage the timeline
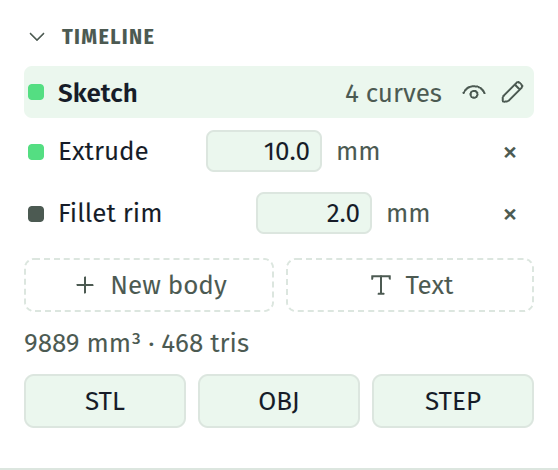
Switch which sketch you are editing
Click its row. The canvas shows that sketch, and the docket shows its constraints.
Two icons do it with a destination in mind:
- Eye: activate and go to the model view. Good for looking at what a feature contributed.
- Pencil: activate and go to the sketch view. Good for editing it.
WARNING
Switching sketches clears undo and redo. Finish what you are doing before you click another row.
Change a distance
Extrude and blend rows carry live fields. Type and press Enter; the solid rebuilds.
Delete something
The × on the row.
A blend goes cleanly.
An extrude removes the feature. Removing the last one drops you back to sketch mode with no solid.
A sketch removes it and its feature, and cascades: every sketch drawn on the faces of that feature goes too, along with every blend naming those faces. Check what is standing on a feature before deleting it.
The first sketch cannot be deleted, so it has no ×.
WARNING
Deleting a feature or a blend is outside undo. There is no getting it back.
Recolour a feature
Click the swatch dot on a sketch row. It rerolls that feature's colour in the 3D view. Clicking the dot does not select the row, so you can recolour without switching sketches.
The colours are a visual aid for telling which feature contributed which material. They are saved with the document and do not travel into an export.
Add another body
New body appends another base sketch on the world plane and makes it active. It is labelled Body 2, Body 3, and so on.
It is a body of its own: it gets a row in the Bodies list, an eye that hides it alone, and it can be booleaned against the others.
Use it when a part has two separate masses that both build up from the base plane.
Read the stats
N mm³ · M tris under the list, once a solid exists. The volume is the fastest check that a feature did what you expected: a 40 by 25 by 10 plate is 10000 mm³, and a 10 by 10 by 5 pocket should take 500 off exactly.
Order
Rows build in order, which is creation order. There is no reordering.
Blends always apply after every extrude wherever their row sits, because an edge does not exist until both its faces do.
Roll the build back
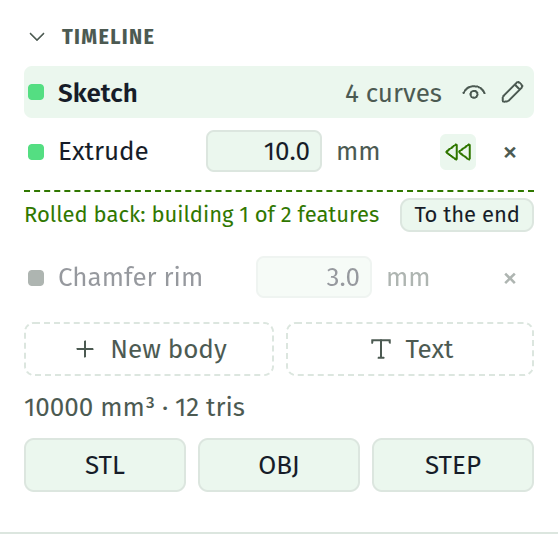
The rewind icon on an extrude or a blend row builds up to that feature and no further. A dashed line appears where the marker sits, saying how many of the features are being built, and everything below it dims.
Nothing is deleted. The dimmed rows are still in the document, still carry their fields, and come back the moment the marker moves.
Use it to see what a feature contributed, or to edit an early sketch with the later features out of the way. The sketch you are editing is unaffected by where the marker sits.
To come back: To the end on the marker line, or the same rewind icon on the row it is standing at.
TIP
Making a new feature while the marker is rolled back returns it to the end, because a new feature lands at the end of the list and building without it would look like it had failed.
A stale row
A row that turns amber with a Stale reference note has lost the face it was drawn on. It keeps building on the last plane it knew. To repair it, pick a face in the 3D view and press the link button on the amber row. See face references.