
Appearance
Extrude, add and cut
Make a solid
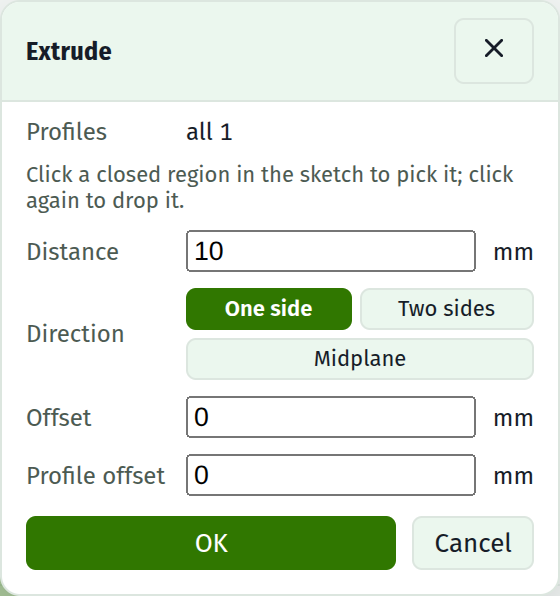
With a closed profile in the sketch, press E (or the Timeline's Extrude… button). The extrude dialog opens over the drawing: type a distance and press OK.
The view switches to Model and the Timeline gains an Extrude row.
The button is disabled
It reads Close a profile to extrude. The profile row in the status foot says why: an open chain, or branching geometry. See diagnose a sketch.
Pick which profiles sweep
By default the extrude takes every closed region in the sketch. With the dialog open, click a region to pick just it; click more to add them, click a picked one to drop it, All to reset. The picked regions shade stronger while you choose.
Two profiles that need different depths are two extrudes: pick the first, extrude, open the dialog again and pick the second.
Add material to an existing part
- Switch to Model and pick the face you want to build on.
- Press Sketch on face.
- Draw the outline.
- Press E and extrude with Join selected.
See sketch on a face.
Cut material away
The same, with Cut selected in the dialog's operation row.
Cut is only offered on a sketch drawn on a face. A base sketch on the world plane always adds, and the operation row is hidden. To carve into a part, the cut has to be drawn on it.
The cut goes into the material from the face it was drawn on, to the distance you gave. A distance longer than the part goes all the way through.
Keep only the overlap
Intersect keeps what the new material and the part share, and drops both remainders.
Build a separate body
New body puts the feature into a solid of its own instead of joining the part under it. The new body lists under Bodies with a name and an eye of its own; boolean it against the rest with a combine when you choose to. This is how a lid is made in place on the box it fits.
Direction
A negative distance goes the other way along the plane normal. Type -5 rather than looking for a flip button.
Two sides gives the sweep a second distance running the other way, each side with its own number.
Offset starts the sweep off the sketch plane entirely: a boss that begins above the face, or a pocket that begins below it.
Midplane
Midplane starts the extrude half the distance behind the sketch plane and ends half in front, so the plane sits in the middle.
Use it when the sketch plane is a symmetry plane of the part: the geometry then stays symmetric about it when you change the thickness.
It is ignored for cuts. A cut is positioned by the face it is drawn on, and straddling that face would carve air on one side.
Change it later
The Timeline row carries a live distance field; change it and everything downstream rebuilds. The gear on the row re-opens the dialog with the feature's numbers and its picked profiles, so direction, offset and operation are editable after the fact too.
Check it worked
The volume under the Timeline is the quickest confirmation. A 40 by 25 by 10 plate is 10000 mm³. A 10 by 10 by 5 pocket should take exactly 500 off.
If the volume did not change, the cut did not reach the material or the profile did not close.